 If you don’t want to read on, the short answer is ‘no’.
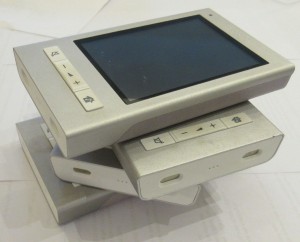
I have had a number of CR200 Sonos controllers fail with the ‘dead spot’ fault. This is a common fault on these controllers, the other being the ‘ghost touch’ fault where the controller appears to be operated by a ghost when noone is near it. It is not fun to be woken up in the middle of the night by loud music in your bedroom when this happens! It seems like these two problems have caused Sonos to abandon manufacturing their own controllers; you can only control their system with either their desktop app on your computer, or an iOS or Android app on a phone/tablet.
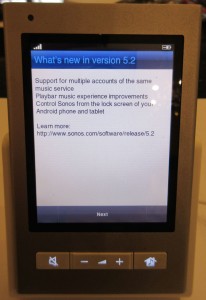 Back to the ‘dead spot’ fault. This is where areas of the controller stop responding to touch in some areas. It mostly seems to affect the lower areas of the screen, making it impossible to view the playlist, use the back button etc. When it affects the bottom row, it is impossible to upgrade your controller as it needs you to press ‘Next’ to continue. This renders the controller useless. (If only they had a way of reducing the screen display area to move the buttons, or flipping the screen when you turned the controller upside down.)
So, I thought I would see if it was possible to fix this myself. If you have ever taken apart an LCD calculator, it has a connection between the glass LCD display and the circuit board made of conductive rubber which can be cleaned and reassembled. I was hoping for this type of thing..
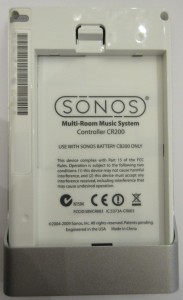 Disassembly starts with the battery cover and battery. There are two screws which hold the rear cover in place. One has a tamper-proof label over it so Sonos can see if you have been meddling with it.
Undo the two screws and then the white plastic cover can be lifted away at the top and then withdrawn from the metal chassis at the bottom.
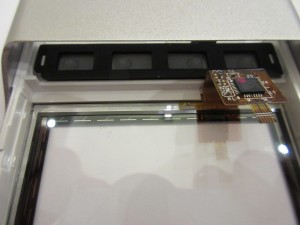
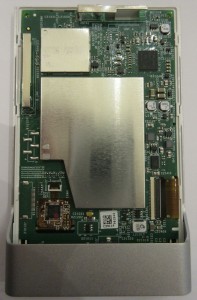 Here is what it looks like inside. There are two membrane cables with zero-insertion-force connectors. The longer one on the bottom right is for the screen, and the one at the bottom left is for the touch.
These both have black levers which when lifted up allow the cables to be removed easily. Once this is done, the circuit board can be released at the top-centre where it is clipped into the plastic and lifted away. There is one remaining connection to the speaker at the bottom. In my case, the speaker came away from the base so it didn’t need undoing.
 Once the circuit board is removed, you have the screen, which now be lifted out. You can now see the touch screen circuit around the edge of the glass and the connections from the glass to the membrane wiring and controller chip.
So, the touch resolution of the screen is really low, and so one row or column failing will render the touch function useless – with a resolution even as low as double this it could cope with a row or column failure. The membrane for the touch is bonded to the screen and so there is nothing further that can be done.
Summary: Other than to marvel at the excellent design of the metal case and internals, there is no point in ever taking a CR200 apart. The dead-spot touch failure is either in the tracks in the glass (unlikely), their connections to the membrane or the controller chip. Given that the failures seem to happen in commonly used areas, it is possibly a design fault in the controller chip (like lack of sufficient over-voltage protection). The glass appears bonded to the metal case and so you can’t even swap it out. What a shame Sonos didn’t invest in fixing this. I still prefer their controllers to an iOS app.
I loved using the cr200 controller to control the system but I’m so disappointed with it now. It’s not cheap to just replace it. Shame on a system like this to have a defected design.
Great guide. Had sticky stuff in the buttons and the guide helped me remove it. Now it works 100% again. Thanks!
Great! Like Henrik I had sticky stuff and hard to push button. On my first attempt disassambling I gave up but then I found your guide. Thank you very much! 🙂
Great guide. I was hoping for solution. One thing i don’t understand is, on my controller, the ‘Music Library’ and ‘Line In’ buttons does not work on the ‘home’ display, but in Room options, that part of the display does work.
Many thanks for this really helpful guide. I had 2 cr200 controllers, one with the known display problem, and the other did not work outside of the cradle (hardware damage, no battery problem). I disassambled both and made one fully working controller of them. With the guide it is really easy to disassemble the cr2.
In German: Vielen Dank für diese hervorragende Anleitung. Ich hatte 2 CR200 Controller, einen mit dem bekannten, oben beschriebenen Display-Problem und der andere funktionierte nur noch in der Cradle und ging ansonsten einfach aus (Hardwareproblem, die Batterie war definitiv in Ordnung. Ich habe beide Controller auseinandergebaut und mit dem Display des einen und dem Motherboard des anderen daraus einen wieder uneingeschränkt funktionierenden Controller zusammengebaut. (Nur) dank der Anleitung ist es wirklich einfach, den CR200 zu zerlegen.